Introduction
After a couple of years of not even remembering about this wonderful piece of high-end gaming equipment I got my hands on a 9999 in 1 brick game.
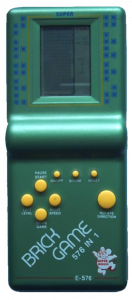
They come in various versions. The number of games may vary (though in fact there are just a few of them, the rest being merely a result of cross product with all possible levels). Colors vary too, but they're all ugly.
Anyway, the device features a whooping 10x20 pixel main screen and a handful additional indicators like play/pause, next element (tetris), etc., and a couple of 7-segment displays, and can get me to spend hours (well okay, minutes) rotating bricks or racing.
So I thought there must be a way to overcome the low contrast of the display and the hopeless feel of the buttons and I started investigating.
Reimplement the whole thing for a PC or a custom device? Nah, too much work, and you loose the best part of it, its vintage-ness. I'll never make it work exactly the same as the original device, so that's not an option.
But what if we just give the thing some new I/O...
A device to which you plug in the main board of the game (with the keyboard module, screen and buzzer cut off) and which passes the keypresses from a better keyboard and displays the graphics on a better LCD. Or maybe for a start just a PC-link to allow one to play their original brick game on a computer, with absolute assurance that the game behaves exactly like the original thing and is cycle-perfect.
Reading the screen
"A piece of cake", I thought and I got down to probing the device. "Sniff SPI or 8-bit parallel data that goes to the screen or whatever, and we're good to go". Little did I know about true low-cost solutions.
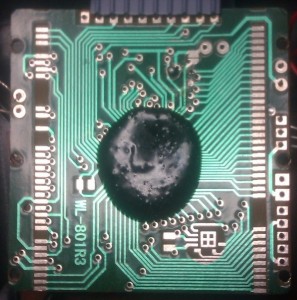
Of course the screen has no driver, and sure, the driver is integrated into this beautiful COB, which also holds the whole firmware:
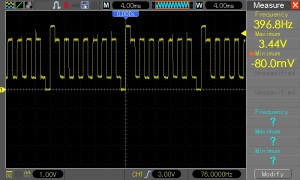
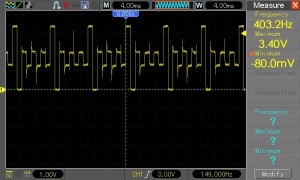
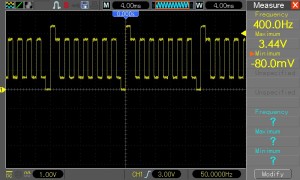
So I started probing around at random and basically I could find two types of waveforms:
Disconnecting the LCD helps make the signal more obvious:
Now to start explaining any of this, let's see how a passive liquid crystal display works.
Static LCD
This is the simplest case. There's one common electrode and one for each segment/pixel/etc. You connect common to ground, and drive some of the segments with a positive voltage (this voltage depends on the type of device and it's possible to damage an LCD with too high voltage).
The segment lights up (well, actually dims the reflected light - it goes black) and after a short moment it goes away. Disconnect the segment and connect it again... and nothing happens. The segment builds up a charge and won't twist again if you don't discharge it.
If you've ever wondered why when you play with old LCDs from watches or vintage electronic assistants you can turn pixels on, but never hold them on for longer, that's the reason. They actually require AC to work correctly.
So the basic driving technique would be to alternate between low and high for common at some frequency, and for off-pixels set their lines to the same state as common, whereas for on-pixels, set them to the opposite state. This asserts current flow in alternating directions through all on-pixels and the LCD is happy.
Multiplexed LCD
The problem gets harder when we get to multiplexed LCDs. Unlike LED-arrays, they don't have cathodes and anodes, just columns and rows or whatever you call them.
And it's not really that hard to drive such LCDs, at least nowhere near as hard as it is to understand how a particular driver works, because its designers may have chosen any algorithm that works for them. And there seems to be a lot of them, at least a few that I can think of off the top of my head.
Reverse-engineering the driver the hard way
I spent the next 4 hours or so trying to figure out how the driver works and well, it was not that necessary, because I don't really need to know that to make a simple frame grabber, I thought, but anyway.
Let's take a look at the first type of waveform that I observed.
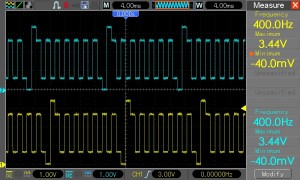 If we treat it as a binary signal for now (forget that thick square spike once a period) it's basically a square wave with one edge inverted. The very first idea that came to my mind was that this has something to do with choosing a group of segments, as part of the multiplexing process. So I found more of these signals, and just as I had thought they were phase shifted. On the right are two of them at the same time (I can't do more, my oscilloscope has two channels).
So I went on and assumed that this inverted edge is there to choose one of eight possible groups. If this was the case, then the other signals (segments) should oscillate in phase with that square, so that the voltage across a particular pixel stays at zero volts. When a particular group is chosen (1/8th of the period), the pixels which are supposed to be off will be flipped too, so that the voltage stays at 0V. Those which are to be off, will remain the same, so that the voltage across the pixels is positive for a while and then negative, also for a while. This asserts that any charge will go away, and the pixel will be charged again, keeping it on.
But that obviously doesn't make sense, because if the edge on the off-pixels is flipped to make the voltage across it 0V for that group, the voltage on this segment is out of phase with all the other common signals, so voltages across that pixel in all the other groups form that 2 small positive/negative spikes. In the end this kind of driving results in the whole screen black.
Then I remembered that this signal isn't in fact binary, and moreover, the segment signals are far from being binary and I thought, I really don't care how it works, and I started to try if I can just read the state of a single pixel somehow.
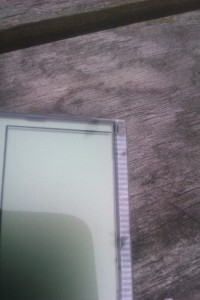 It appears that the two groups of signals that control the LCD (let's call them commons and segments) are clearly marked on the device, which I noticed pretty late. If you look carefully, you'll see tiny dots next to the top 6 lines on the right edge (well, the screen is rotated here). There are more of them all over the whole screen and they correspond to the first type of signal (common or square wave with one edge flipped, if you will). All the others are presumably fed with the other type.
Now there are more of them than 8, but it appears the screen is divided further. I've managed to find 8 common signals that correspond to the first 8 columns of the main display, so that would be enough so far.
Reading pixels
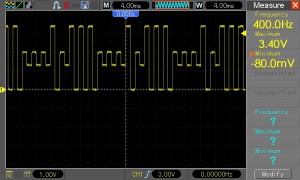
I put two probes of the oscilloscope to one electrode with a dot and one without, subtracted the signals, and here's what I got:
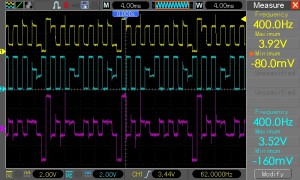
I assumed that pixel was on at the time, which later appeared true. Note how they drive the pixel. Because the display is multiplexed, and the previous waveforms suggested there should be 8 groups, the pixel is actually driven 1/8th of the time. Each time it's driven in gets two pulses of opposite polarity, each about 3.8V (I have the device connected to a stabilized 3.3V supply), lasting 1.25 miliseconds each.
Then I went on probing the device, and noticed also a second type of waveforms:
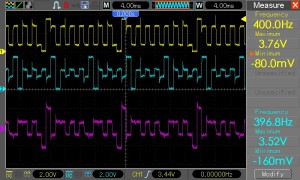
These seem to be the ones which are fed to pixels that are off. They're very similar to the previous ones, but the peak amplitude is lower - slightly over 2V.
To check my assumptions, I build a simple LCD tester, which looked like this (please forgive the crudity of the schematic capture):
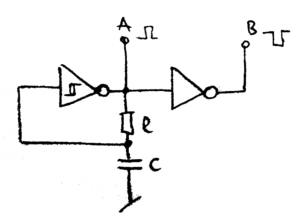
It didn't work very well, because the display actually has enough capacity to couple the AC signal, and in fact, whole groups of pixels would go black as you swipe the contacts with outputs A and B, but with R = 1k and C = 10μ it generated about 100Hz which was fine to see where the contacts were connected.
This behavior means you cannot just leave some wires unconnected or tri-state them to put the pixels to off-mode. You have to provide the right voltages to achieve low enough voltage difference between two electrodes of a pixel. Or at least that's what I assumed having as much data and knowledge as I had.
Then I set the device to display the starting screen and started probing the pixels for which I knew the expected states, and this proved I was right as to how the pixels are driven.
Brute force frame grabber
So I quickly went on to design a simple frame grabber. It would multiplex every row and every column (that is "for every pixel ...") and read the voltage across that pixel fast enough not to miss any peaks. A simple design with a PNP for every row and an NPN for every column, one resistor and a analog comparator to test if the voltage is above 3V would probably do the trick, but I won't put the project here, because I dropped this idea sooner than I thought.
Just for the record, what kind of capture rate would it have to have? The spike (both negative and positive) lasts 1.25 miliseconds, so trusting Shannon and Nyquist and probing 2 times faster than that would probably be good enough. That is 1600 times per second. Now that has to be done for every pixel, and there are more than 200 of them, so if there was just one "probing cell", it would mean about 320 thousand samples per second. Certainly doable, even on a simple AVR.
One could also build a few of such cells, say 8, to output whole bytes, but that would complicate matters and increase the component count, so I quickly dropped the whole idea and went back to my oscilloscope to make up something better.
hi, I wanted to replace the lcd with leds using npn transistors or max7219 chip. Heaving a little electronics knowledge I thought since the lcd has square pixles , I can simply replace each square with an LED and make a big screen to attach on wall and be able to control with the console. Seems like an impossible idea, now that I know those pixels don't work the way I thought they do. Anyway this entertained it a lot, even though most of the oscilloscope stuff went over my head, I love the fact I get to read the entire process of reverse engineering. Not only that I got another lead from a comentor on your second post. May be someday in future I will be able to perform same as you and will be able to understand much better than now. If you have time come and guide the community of Instructables.com , the worlds biggest diy community. People like you would be awesome for the community, as not many articles their go in depth and just rely on copying others. Thanks and good luck. I am d1ndian on instructable.com
Hi,
this looks like an interesting project. I haven't considered something like this but it's definitely worth a try. Even if you can't use the original game chip, some of those games should be really easy to re-write for a simple microcontroller to work on such a big wall display.
As for reading the actual display of the "9999" game, it is certainly possible, as you can see from my 2 posts, but just a lot of work, so I kind of abandoned the idea. It would be still cool to see something like that work for someone...